Simple Soap-Making Tutorial

Making soap is honestly one of my favorite things to do. I find fascination in the science, enjoyment in always learning more about my craft, and peace in knowing what my family is using on their skin each day. Nearly five years ago a friend opened my eyes to the world of homemade soap, and today I would consider it a joy to share with you this Simple Soap-Making Tutorial!

There are a few ways to go about making soap at home. Each process has its pros & cons; I prefer making soap using the cold-process method. You can find a wealth of information about the cold-process method of creating soap and soap-making science in general {HERE}.
The first thing you need to do is gather some materials. Most of what you need you probably already have in your kitchen. The rest can be picked up inexpensively brand new, found in second-hand stores, or even borrowed from a friend.
**Supplies needed – large pot, plastic spoons/spatulas, soap mold, mold lining material, digital or candy thermometer, plastic bowls (1 for essential oils, 1 to measure soaping oils, 1 to measure lye, 1 for water), gloves, apron, protective eyeware, stick blender, kitchen scale, oils (in this recipe we’re using palm & coconut oils), lye (make sure it’s 100% pure sodium hydroxide), and any add-ins (today we’re using orange & lavender essential oils).
All soap-making utensils/pots/bowls must be made of plastic, heat-safe glass, stainless steel, or enamelware. No wood spoons or non-stick coated pans here, please….they will get ruined! It’s also advisable to dedicate a set of bowls, spoons & spatulas to be used only for soap-making.
Today, we’ll be making the simple bar of soap I use in all of my homemade laundry soap recipes. It’s made with coconut & palm oils and is scented with pure lavender and orange essential oils–one of the sweetest, cleanest and freshest scent mixtures I’ve ever found. The basic process I’m sharing with you today will stand for any cold-process soap recipe you want to try!
After gathering your materials, you need to measure out the lye and water amounts for whichever recipe you’re following.
**Before we go any further, let’s first talk about lye safety. Sodium Hydroxide (lye) by itself is an extremely caustic alkali, and you need to take appropriate steps to keep yourself and those around you safe from accidental ingestion and exposure to clothes, skin, eyes, etc. Always wear gloves when handling lye/lye solution and protect your eyes with safety goggles. I also make sure to wear an apron I’ve designated only for soap-making to protect my clothes. When setting out to make soap, be sure you have an hour or so when you can keep pets, kids, & clumsy husbands out of the area while you are making your soap. Consider using a sheet of newspaper or an old towel to protect your counter top from the damage static-prone, moisture-loving lye beads can do to some surfaces.
It’s important to note that lye is only dangerous before it undergoes saponification – the chemical reaction of sodium hydroxide (lye, your alkali) with an acid (your soap making oils). The marvel of a caustic material commonly used to clean drains, reacting with oils to make a perfectly safe and lovely bar of soap is easily one of the major reasons I find soap-making so fascinating! **
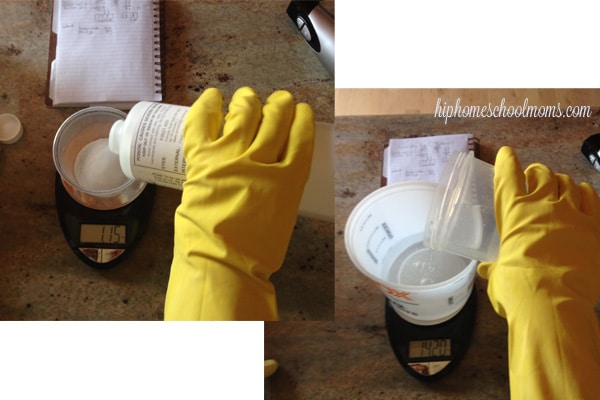
You will want to measure your lye and water by weight and not by volume – a kitchen scale is vital at this point! You will measure your lye into one container and distilled water into another. Distilled water is always good to use in order to avoid any unwanted minerals/impurities that could affect the way your soap behaves.
You are now ready to make your lye solution.
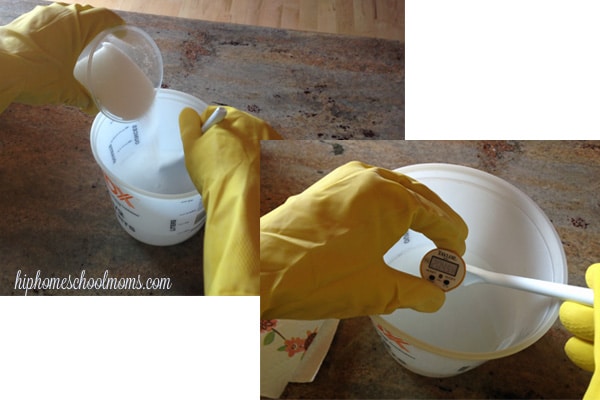
Always, always, ALWAYS pour your pre-measured lye into the water….NEVER pour the water into the lye container, the results can be explosive and extremely dangerous! Stir the mixture slowly, steadily, and constantly until the lye water is clear and not cloudy. After your lye is poured into the water, the solution will instantly heat to more than 200 degrees, and you must be careful not to breathe the fumes created by this reaction. After the mixture has turned clear, you can set it aside to begin to cool somewhere where it will not be accidentally spilled or mistaken for water.

You can now measure out the oils your recipe calls for. Again, measure by weight and not by volume. Once all oils are added to the pot, you can heat the solid oils to liquid over a medium-low flame, stirring frequently. Once melted, set your oil mixture aside to cool where it will not accidentally spill and can be kept free of lint/pet hair/dust. I like to cover mine with a clean dish towel.
You now need to wait for your oils and your lye solution to cool. Both mixtures need to be within 10 degrees of one another and less than 130 degrees before you can combine them. I like to mix water soaps anywhere between 100-115 degrees. If one mixture it taking too long or you’d just like to speed up the cooling down you can submerge your mixtures in a sink filled a few inches with cold water, making sure not to let any extra water spill or drip into either. Periodically check both mixtures with your thermometer, wiping the probe as you alternate if you are using only one thermometer (like me, haha). This is one of those steps you eventually just get a feel for with time, keep practicing!!

Once both mixtures have cooled to approximately 110 degrees with only about 10 degrees separation between your lye solution and your oils, you’re ready to combine the two. Pour the lye/water mixture into the pot with the oils and set the lye solution bowl in the sink to be washed.
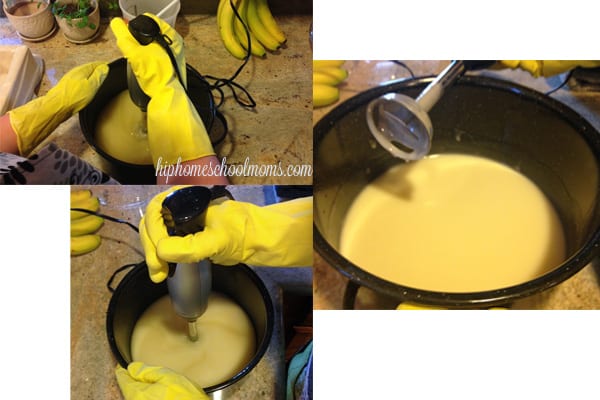
The next step is to bring your soap to “trace,” which is what happens as your lye solution reacts with the oils and begins the saponification process. The best way to whip your mixture to trace is with a stick blender. I found one very inexpensively years ago and reserve this cheapo blender solely for use in soapmaking. Rest the blender all the way on the bottom of the pot and blend on low speed. I like to count slowly to 10 while blending and then mix manually with the blender switched off for another slow 10 count. Mixing by hand with a whisk or spoon can take a very long time but being heavy-handed with the stick blender can cause your soap to trace too quickly. Alternating strikes a good balance in my opinion. You will alternate in this way until your soap reaches a light trace, which will resemble thin pudding. When you lift up the blender and the soap dripping into the pot very briefly leaves a trail on top of the mixture before melding with the rest, you are at light trace.
**Be careful of liquid splashing onto your skin during this step. It is often unavoidable that some will splash onto your arms while it’s at its thinnest, and it will mildly irritate your skin when it does. I always joke with my husband that I have to survey my mild chemical burns after soaping. I make a batch or two of soap every week and almost always have at least one spot where I am splashed lightly. When it happens, just carefully set your blender/spoon/spatula down and wash the affected area with mild dish soap. It wont HURT you, it is just something of which to be aware!
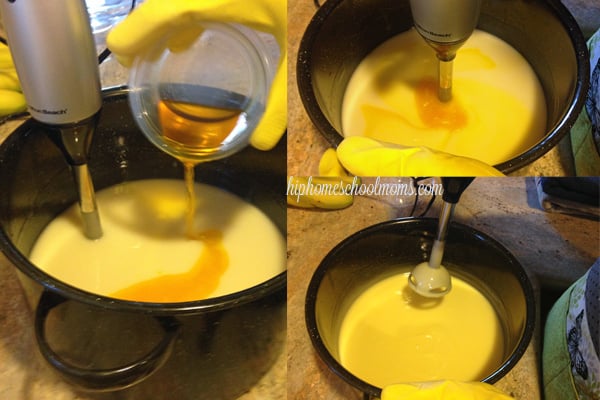
Now you will mix in any additives (honey, oatmeal, color, scent oils, etc.) into your soap. For this recipe I am adding pure orange and lavender essential oils. Pour them into the pot and keep mixing with your stick blender. You’ll mix until all additives are combined and your mixture reaches a full trace. You will recognize full trace by the thicker pudding-like texture of the mixture and soap trails that will maintain their shape on the surface of your soap for a second or two before sinking into the rest. Do not over-blend or it will become very difficult to work with and can even cause the oils to begin to separate out. Less is more, and even a light trace will give you soap in the end!
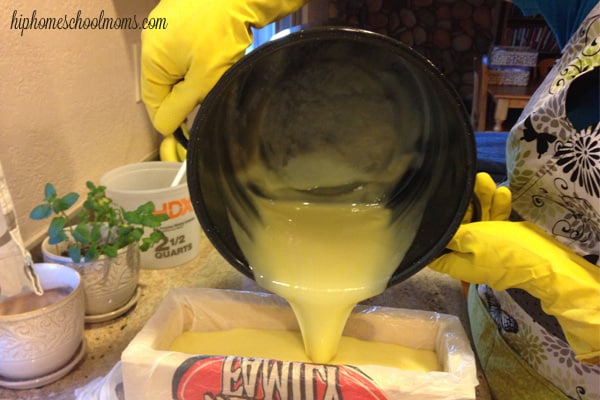
It’s now time to pour your soap into a mold. I like using wooden loaf molds, but you have a lot of options here. If using wood, make sure to line the mold with a plastic bag, freezer paper, plastic wrap or something of the sort. After scraping the pot to get the soap left on the sides, place your pot in the sink to be washed, pick up your mold and set it firmly down a few times to tap out any air bubbles that might have found their way into your mold.
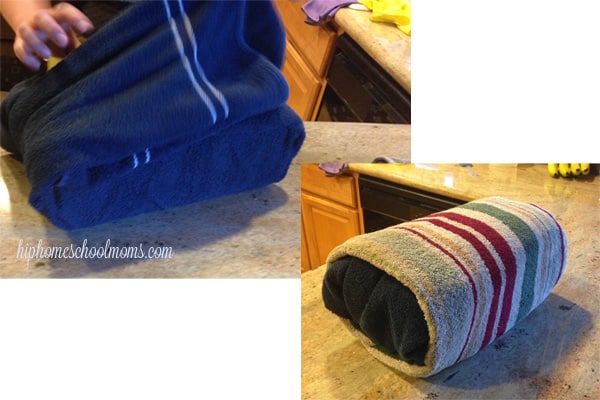
Next you’ll insulate your soap in a couple of old towels. Wrap it up nice and tight, taking care not to tip the mold and spill the still pudding-like soap. Carefully set it somewhere out of sight and out of mind where it can be left to work its soapy magic undisturbed for 24 hours.

After 24 hours, you will have a soft log of soap ready for cutting. You’ll want to make sure not to leave it much longer or it will get too hard and be impossible to cut cleanly. At this point most of the saponification process is complete and the lye is no longer dangerous but it can still be slightly irritating to the skin to handle the soap without gloves. If making a bar to be used on the skin (I happen to use this particular bar for laundry soap) you will need to set the cut soaps aside to cure for at least 3 weeks. Time will allow saponification to finish and any excess liquid to evaporate. This is the key to a long-lasting, mild & skin-loving bar of soap!
That’s all there is to it, folks! Making traditional lye soap is as easy as following a recipe and observing some basic safety precautions. It was a recipe much like this one that made me fall in love with soaping, and I have been blessed with the chance to turn years of hobbying into a tiny little shop at my local Farmer’s Market and on my website, The Handcrafted Homestead.
I hope you’ve learned something from this Simple Soap-Making Tutorial today and that a few of you will have the confidence to give soap-making a try!
How many of you have made your own soap before? What process did you use? How did it turn out? I’m always ready to talk soap, so let’s chat about it in the comments!


It is so amazing that I saw this post today. I have been gathering supplies to begin soap making for the last few days. I hope to make goat’s milk soap. Your tutorial was so timely and very helpful! Thanks!!
Awesome! So glad this found you at a good time. 🙂 Goat milk soap is my fav! As soon as I made my first batch I knew I’d never go back to water soaps (with the one exception of my laundry bar, of course). Don’t hesitate to look me up on Facebook or email through the website of you have any questions I can answer. Happy soaping!
This is my first time visit at here and i am genuinely impressed to read all at alone place.
I have a question. . I have been attempting on doing soap for several months now. My question is: I make my soap the hot process way. After the cure process, which will be after 3wks the soap bars are still somewhat soggy in between each bar. What am I doing wrong? I’m following recipe as given.
Hi Anna! I’ll make sure Danielle sees your question. 🙂
Hello! I have only made one hot process batch before and it’s tough to say exactly what’s going wrong but a few things come to mind. Is it possible an oil got measured and added twice? Did you measure out the lye by weight or by volume? Is the recipe made up of a high percentage of soft oils (liquid at room temperature)? I do know hot process soaps have to reach a certain temperature to properly saponify the lye/oil mixture. My suggestion would be to visit SoapCalc.com and enter the measurements on your recipe into the calculator there to make sure it’s a sound recipe to begin with. I have also heard of new soapers unknowingly using an olive oil that contains canola oil or another cooking oil that won’t properly saponify in soap. Most importantly, don’t give up, and happy soaping!